NOTE: 
To use this feature, an FI must have Vertifi's Desktop apps. FIs using third-party mobile apps for RDC will not be able to display these Promo Ads within their mobile apps using this feature.
To insert a promotional ad ("Promo Ad") for display to RDC users, you must first have the promotional image saved on your institution's website and know the URL for linking this. Also, if you will be activating the image to launch to a page on your institution's own website (when the promo image is clicked), you will also need this URL handy. Once you have these two things, do the following:
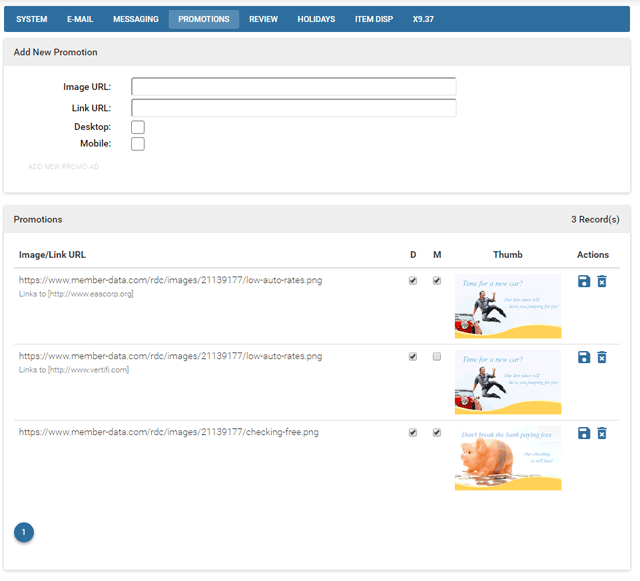
Click the PROMOTIONS tab.
Enter values in the Image URL and Link URL fields as needed. A preview of the image will display to the right of these fields.
Select the checkbox(es) for display to your RDC end users.
To display the Promo Ad only to your RDC Desktop users, select the Desktop checkbox.
To display the Promo Ad only to your RDC Mobile users, select the Mobile checkbox.
To display the Promo Ad to both your RDC Desktop and Mobile users, select both checkboxes.
Click the ADD NEW PROMO AD button to commit the changes.
|
NOTE: |
To use this feature, an FI must have Vertifi's Desktop apps. FIs using third-party mobile apps for RDC will not be able to display these Promo Ads within their mobile apps using this feature. |

Once added, all of the active Promo Ads will display at the bottom of the Promotions page. If you want to change where the Promo Ad will display after adding it (i.e. Desktop or Mobile) simply use the checkboxes in the respective column next to the associated ad to make this change.
|
NOTE: |
When using Promo Ads, please be sure to consider the image size that will display to your end users. E.g. if you opt to display the image on mobile devices, you will want to use a small-scale image to provide for a user-friendly experience when using the RDC application. |
To delete a Promo Ad, select the Delete button ![]() next to the associated item; the image and its associated Image/Link URLs will be immediately deleted.
next to the associated item; the image and its associated Image/Link URLs will be immediately deleted.