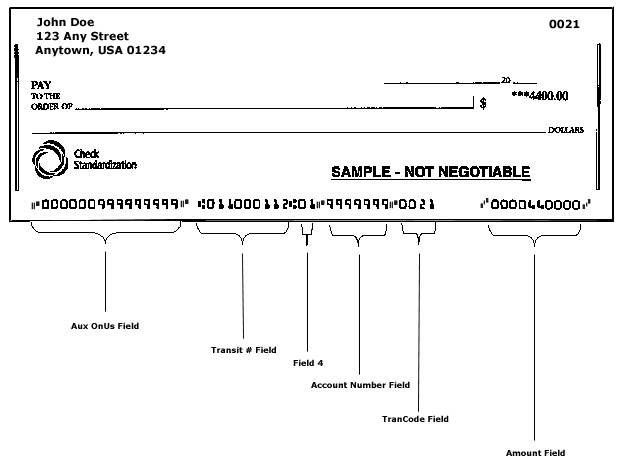
Magnetic Ink Character Recognition (MICR) is the common machine language for the paper-based payment transfer system. MICR information is placed at the bottom of the negotiable instrument and defines the Routing & Transit Number of the paying institution, the Account Number upon which the instrument is drawn, the Check Number, and Dollar Amount.
Participation in the national image exchange network (as provided by the Check 21 legislation) requires the truncating institution (i.e. the financial institution which converts the paper check to an image) to ensure quality and accuracy of the scanned image and its associated MICR data.


MICR information keyed by the DeposZip operator must match exactly to what appears along the bottom of the check. This means that any of the following must be keyed by the operator as they appear in the MICR Line:
all dashes
all leading zeros (0)
any information that appears in Field 4 (see samples below)
if nothing appears (on the image MICR Line) in either the Aux OnUs, Field 4 or the PC/TranCode Fields, you must key a single zero (0) in the Aux OnUs field for the image to be valid
However, if there is a space in the account number field, do not include the space when keying that field.
Below is a series of samples of checks that include dashes, leading zeros, Field 4 data, and spaces (in the account number field).
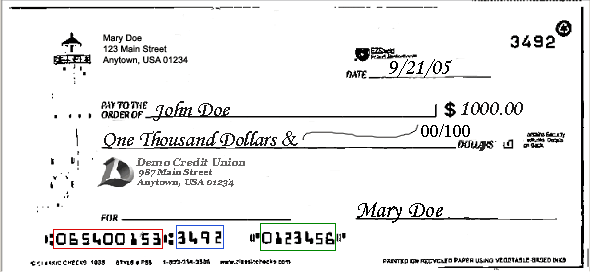
Figure 1
Includes Field 4 (identified by the blue box below) and a Leading Zero (identified by the green box below) in the Account Number Field
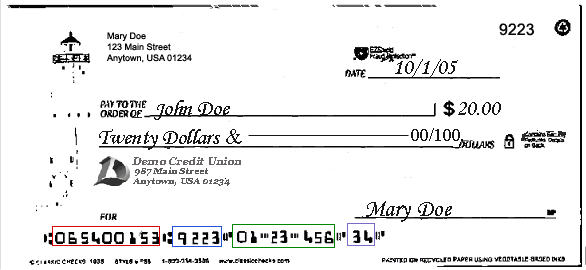
Figure 2
Includes Field 4 (identified by the blue box below), a Leading Zero and Dashes in the Account Number Field (identified by the green box below) and info in the PC/TranCode Field (identified by the purple box below)
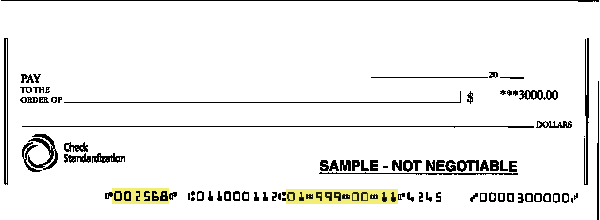
Figure 3
Leading Zeros in the Aux OnUs Field and Leading Zero and Dashes in Account Number Field
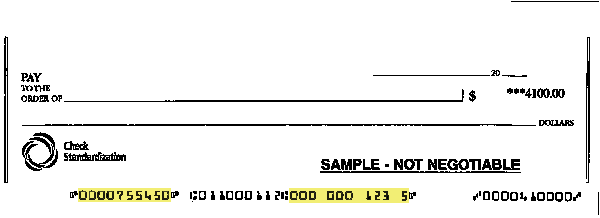
Figure 4
Leading Zeros in the Aux On-Us and Account Number Fields, and Spaces in the Account Number Field (not to be keyed)
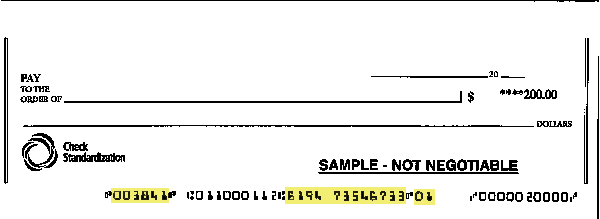
Figure 5
Leading Zeros in the Aux On-Us Field, Spaces in the Account Number Field (not to be keyed), and Leading Zero in the Trancode Field
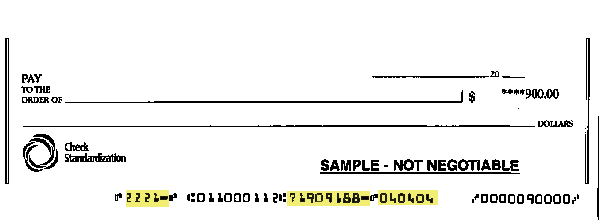
Figure 6
Dashes at the End of the Aux OnUs and Account Number Fields and Leading Zero in the Trancode Field
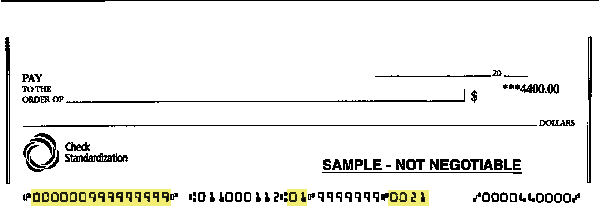
Figure 7
Leading Zeros in the Aux On-Us and Trancode Fields and Data Located in Field 4
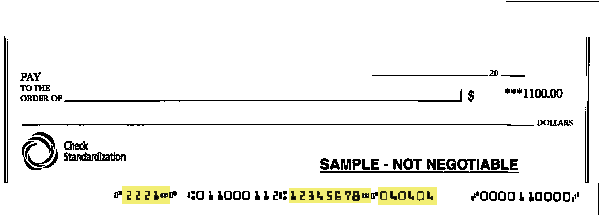
Figure 8
Dashes at the End of the Aux On-Us and Account Number Fields and Leading Zero on the Trancode Field
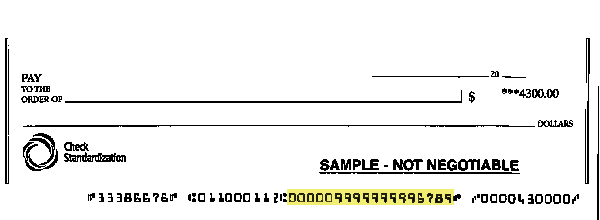
Figure 9
Leading Zeros in the Account Number Field
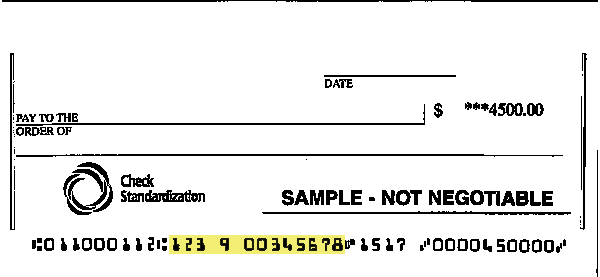
Figure 10
Spaces in the Account Number Field (not to be keyed by the Administrator)
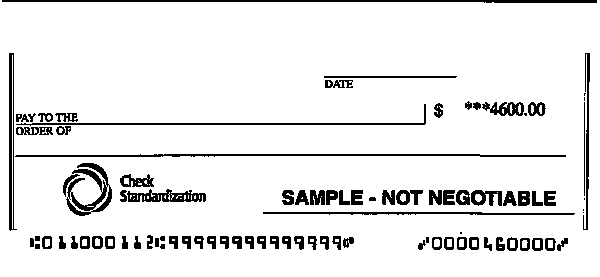
Figure 11
Missing Aux On-Us, Field 4 and PC/Trancode Fields (a zero must therefore be keyed into the Aux OnUs field by the Administrator)